Jobs site
The jobs site is where you can run your code on the server against real data, view your analysis outputs on the server and view outputs that have been reviewed, approved and released from the server by our team of output checkers.
Jobs site structure🔗
The jobs site is centred around Projects. When an application to run a study in OpenSAFELY is approved by the data controller, a Project is automatically created. You can see a list of approved projects, and the organisation they belong to.
We will add any GitHub usernames listed in your approval to our opensafely GitHub organisation. We will also ask you to transfer your existing OpenSAFELY study repository (if you have one) into the same organisation. This allows OpenSAFELY to enforce certain security standards, such as multi-factor authentication.
Warning
It is important that the study repository is transferred into the opensafely organization, not forked into it. Please ask us if you have any problems with this process.
Within each Project, there are one or more Workspaces, which are linked to a GitHub repository in the OpenSAFELY organisation. Any actions you develop as part of your project pipeline within the attached repository are linked to the workspace, allowing these to be run against real data.
A Job is an instance of an Action running on real data. Jobs are run by selecting one or more actions to be run as part of a single Job Request. You can see all the Job Requests that have been run from a Workspace by clicking on "View logs" from a Workspace page. You can see a log of all Job Requests being run.
graph TD
    A[Project] --> B[Workspace]
    A --> C[Workspace]
    B --> D[Job Request]
    B --> E[Job Request]
    C --> F[Job Request]
    subgraph Actions[Actions - taken from your project.yaml]
      Action_1[Action]
      Action_2[Action]
      Action_3[Action]
    end
    Action_1 --> F
    Action_2 --> F
    F --> G[Job]
    F --> H[Job]
Output types🔗
Once outputs have been produced by running jobs from within a Workspace, there are several stages they must go through before being made publicly available:
- Outputs on the Level 4 server. These are aggregated patient-data (non patient-level data) outputs marked as
moderately_sensitivein theproject.yamlfile and are only viewable when logged into the Level 4 server. These outputs have to be reviewed by our output checking team before they can leave the server. - Released outputs. These are analysis outputs that have been reviewed for any disclosivity issues and released from the Level 4 server by the output checking team to the relevant Workspace on the Jobs site. These are only viewable if you have the correct permissions for the Project the Workspace belongs to.
- Draft public outputs. Released outputs can only be shared with close collaborators of your projects (refer to the examples of who this could include). To be shared more widely, they have to first be approved by NHS England. Once approved, and if you have the correct jobs site permissions, you can create draft public outputs for approval.
- Published outputs. Once approved, draft public outputs are made publicly available to view by anyone through the Workspace they belong to.
Permissions🔗
When users are approved to use the OpenSAFELY platform, each user is assigned roles that define what they are permitted to do on the jobs site within their project. By default, most researchers using the platform will have the ProjectDeveloper role for a specific Project, which permits them to:
- Create workspaces in that Project
- Run jobs in Project workspaces
- Cancel jobs for this Project
- View job outputs for any Workspace in this Project
- Create draft public outputs for approval
Users with the ProjectCollaborator role can:
- View released outputs
- View draft public outputs
There are some additional roles linked to the release of outputs from the server, reserved for output checkers:
OutputChecker:
- Release outputs from Level 4 environments
- Delete outputs in a release
OutputPublisher:
- Publish draft public outputs
Viewing and requesting changes to your permissions🔗
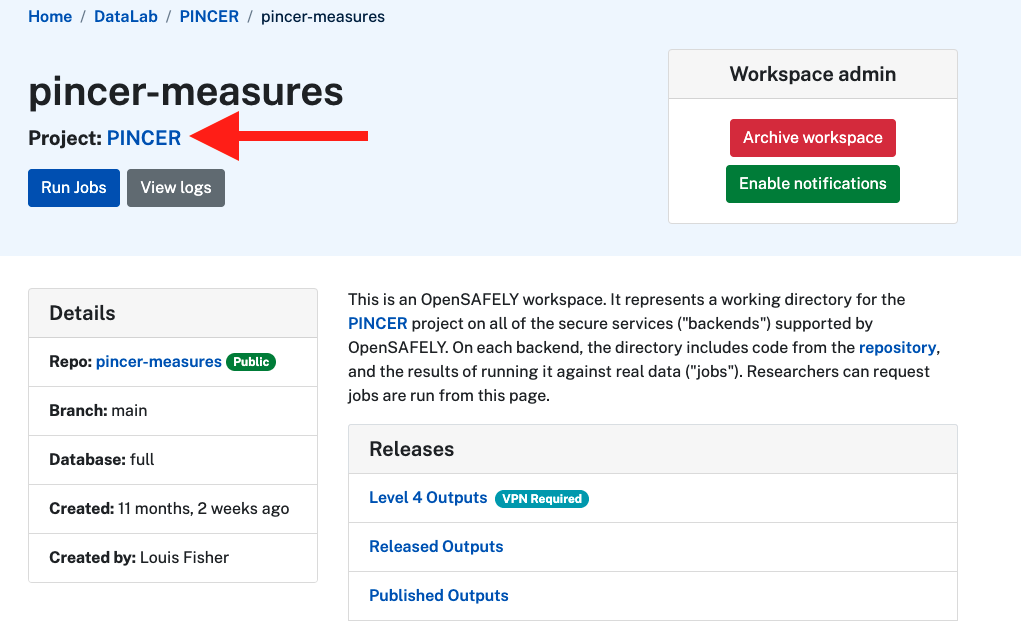
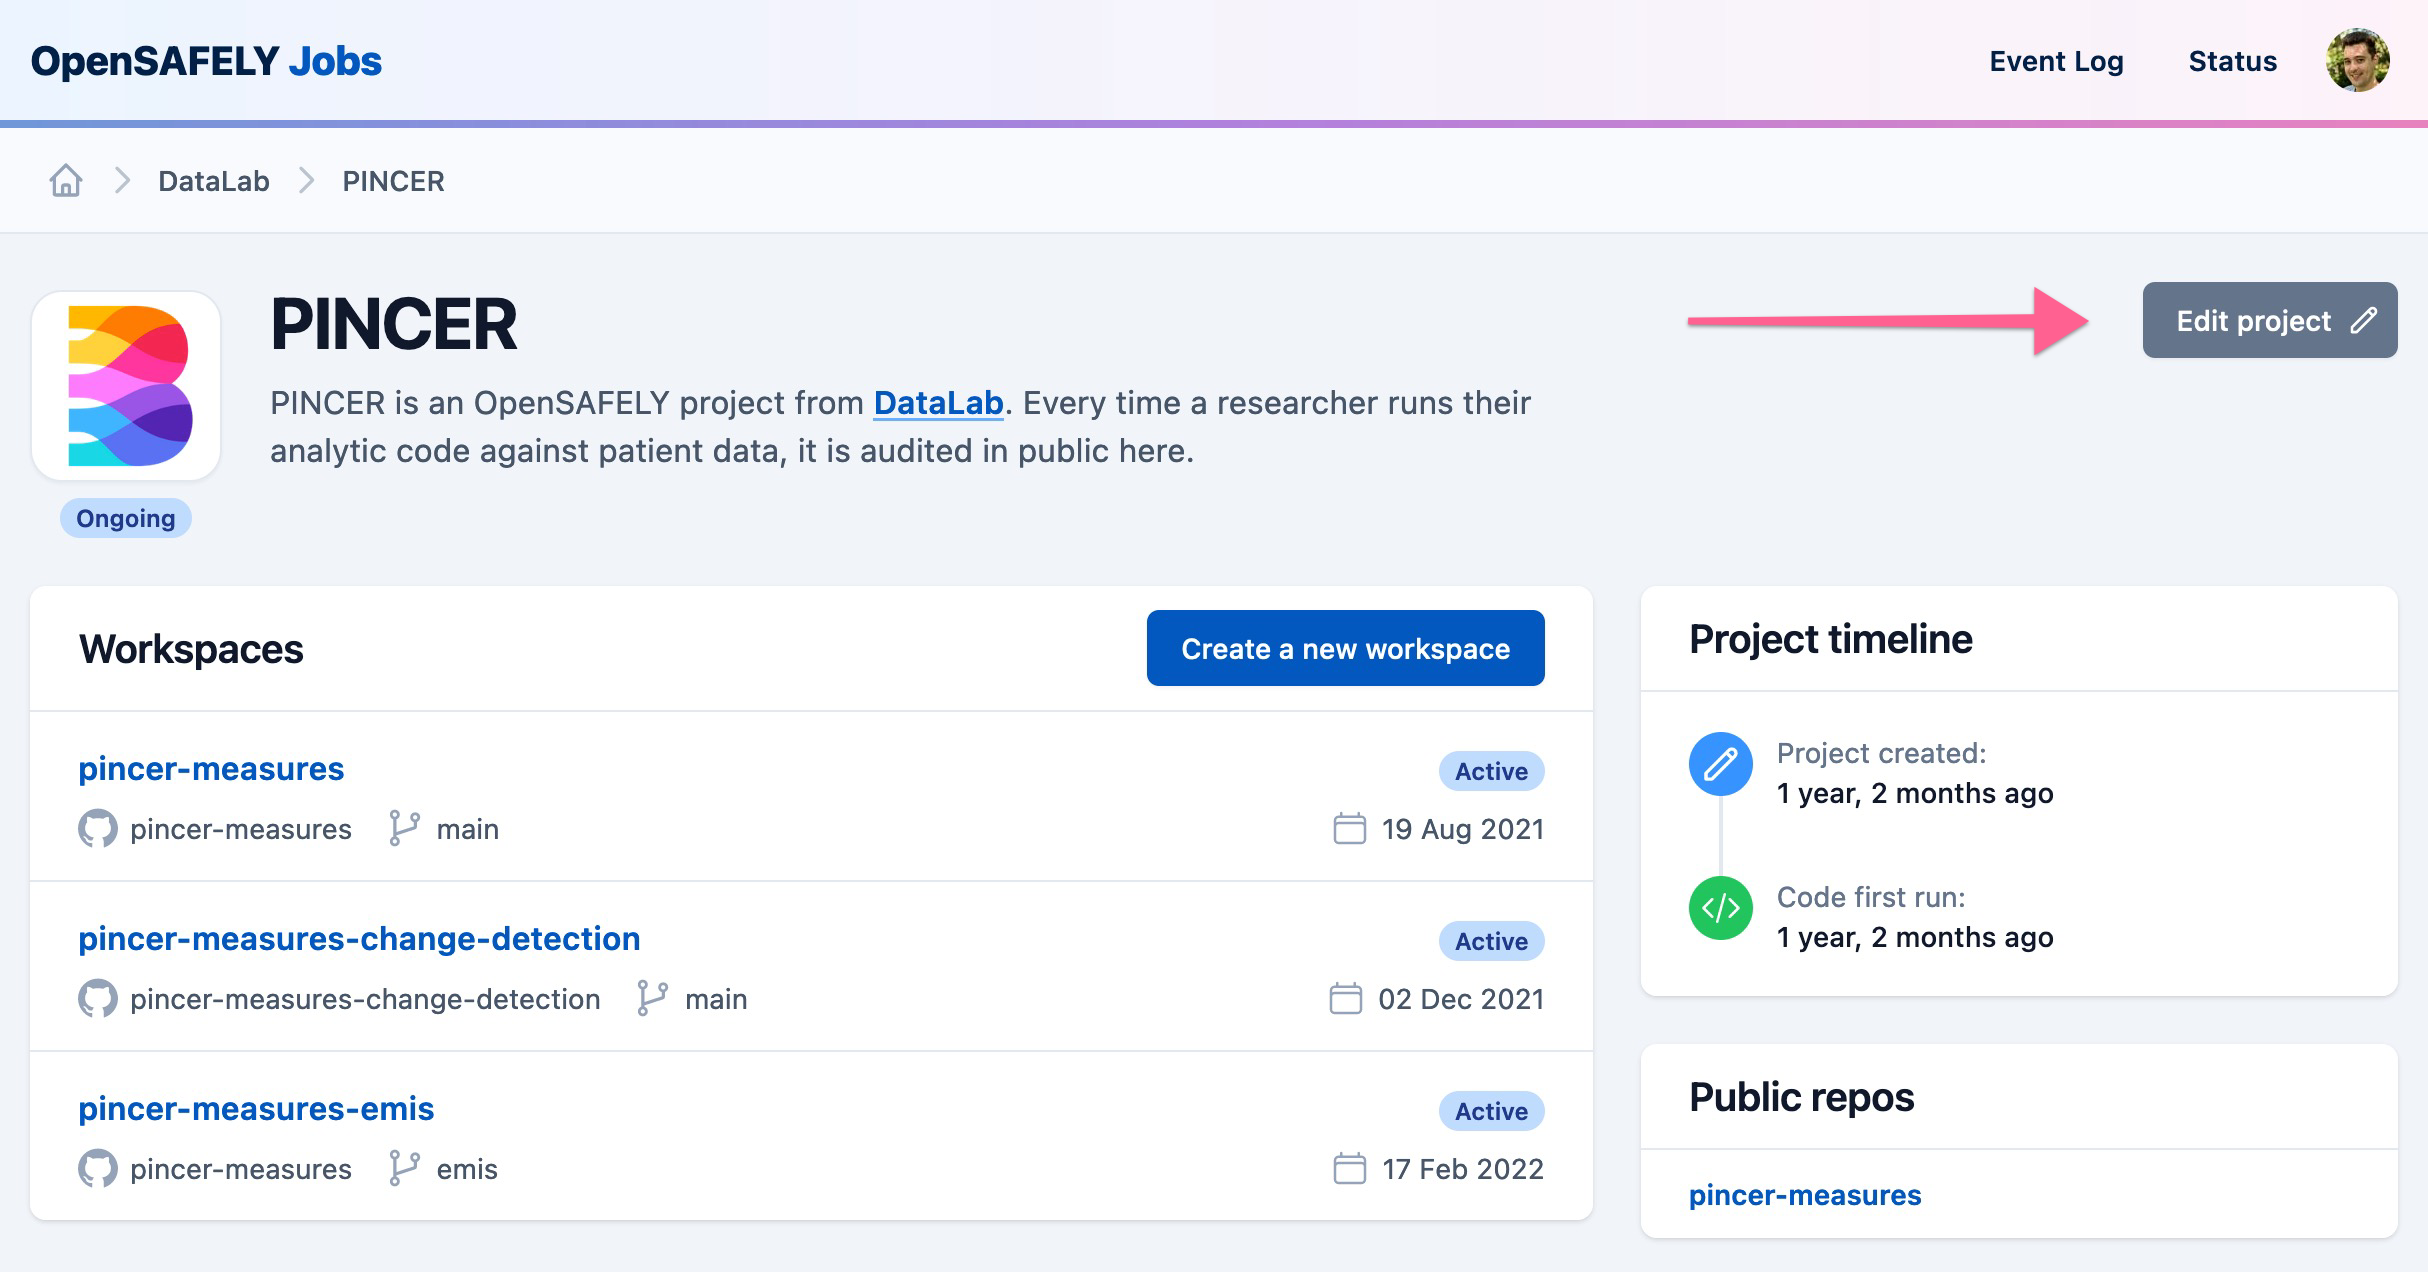
You can view the permissions you have for your project by navigating to the Project page (see arrow below), where can see the permissions for all researchers involved in your project.
If you are not able to do any of the tasks and you think you should, please contact your co-pilot to confirm you have the correct permissions.
Creating a Workspace🔗
- Log in using your GitHub credentials
- Create a Workspace:
- Click the
Create a new workspacebutton (circled in red below). - Pick a Project from the list.
- Click the
Create a new workspacelink.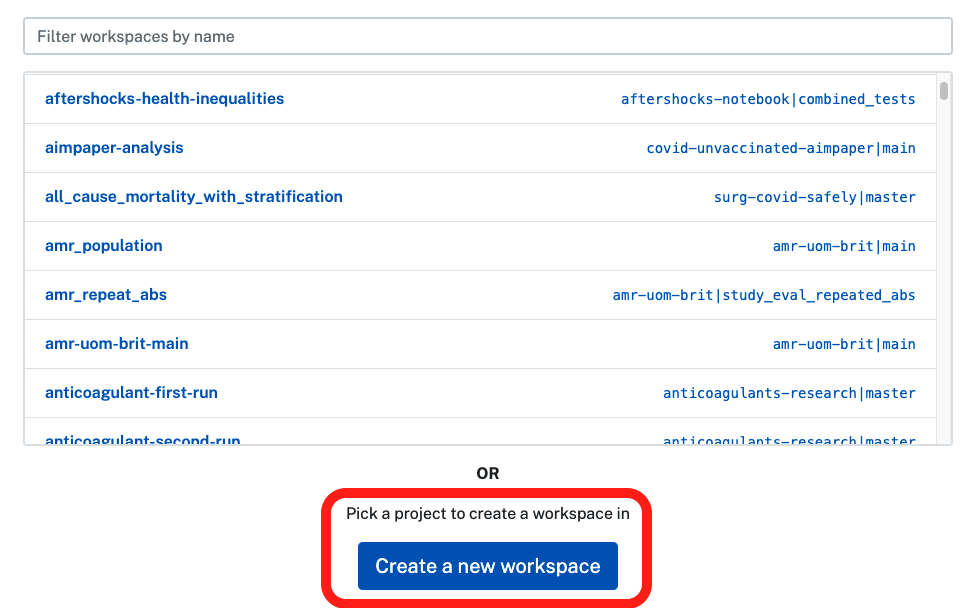
- Choose a name, for example the name of the repo.
- Select the repo and branch whose action you want to run (in most cases, the branch will be either
mainormaster). - Click
Create.
- Click the
When you add a new repository in the opensafely organisation, it may take up to 15 mintutes for it to be available to select at https://jobs.opensafely.org.
Running your code on the server🔗
- Click the
Run Jobsbutton (see red arrow below) from your workspace.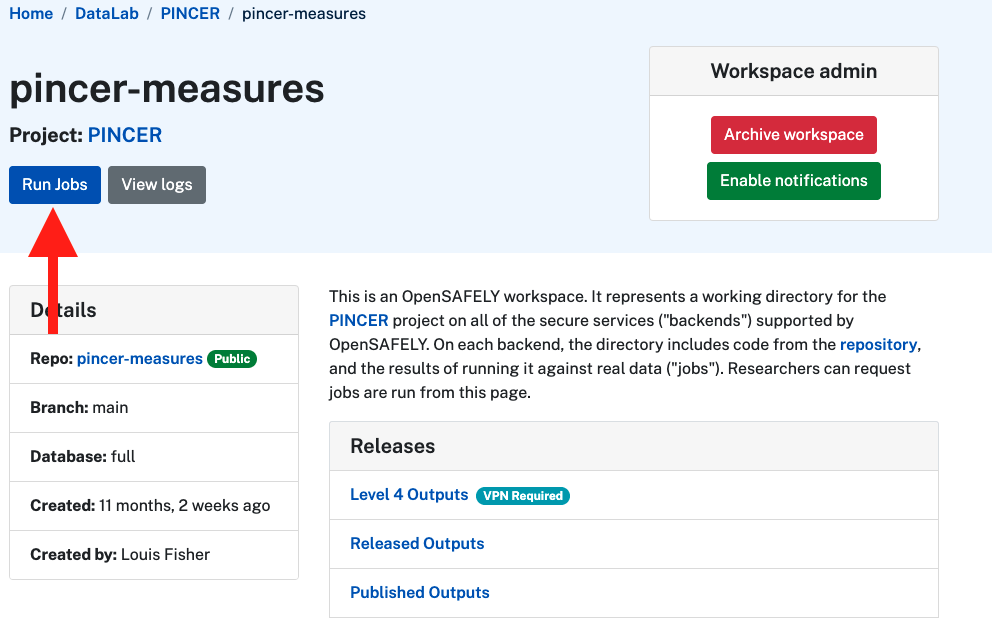
- Select actions to run:
- Select the actions you want to run by clicking the
Runbuttons. - If any of these actions have dependent actions (e.g. running a cohort extractor action before an analysis script is run) then they will also be run, unless their outputs already exist.
- If any dependencies have already been set to run, your current job will be queued until dependencies have completed.
- Dependencies can be viewed by clicking the
Needsbutton. - You can force dependencies to be run by clicking
Force run dependencies, even if those actions have already been run. - You can choose to send notifications for the selected actions to your email address.
- When you're ready, click
Submit.
- Select the actions you want to run by clicking the
The workspace is available at https://jobs.opensafely.org/<WORKSPACE_NAME>/.
You can view the progress of these actions by click the Logs button from the workspace, or going to https://jobs.opensafely.org/<WORKSPACE_NAME>/logs. If you selected to receive notifications, you will also receive an email to notify you when each job completes.
When you submit a job-request you are competing with other users for resources on the server. As such, jobs can sometimes take a while to start even if their dependencies have successfully completed. You can see all the jobs currently running and the current status of all OpenSAFELY backends.
Click here for information on the exact steps that occur when each job is run on the server
What happens:
- A new, empty temporary directory for the job is created.
- Copy in all files on the selected branch.
- The job is run.
- All the files matching the specified output patterns are copied into the local repo.
- The log files for the job are saved into the
metadata/directory. - The temporary directory is deleted.
Each job will either succeed or fail. In either case, the output and log files are only visible in the secure environment to avoid disclosure of potentially sensitive information.
Viewing analysis outputs on the server🔗
You can view moderately_sensitive outputs from any of your submitted jobs
via the Jobs website if you have access to and are logged into the backend
the job was run on.
However, whilst normally you log into https://jobs.opensafely.org from your machines browser using GitHub, the secure server does not have access to GitHub. So you need to use an alternate method to login, by generating a Single Use Token, and then using it on the secure server to log in.
To generate a Single Use Token, before logging into the secure server, visit https://jobs.opensafely.org/settings/, and click on "Generate a Single Use Token". This will be 3 english words, which you can memorize or write down. This token can be used to log in as you, but is only valid for a short time, and only works once.

Once you are logged into the server via the VPN:
- Navigate to https://jobs.opensafely.org/ using Google Chrome (make sure to use
https://) - Log in using your email or GitHub username, and the Single Use Token from the above step.
- You should be now logged in. This login will expire after two weeks of not being used.
Once logged in, to view your moderately_sensitive outputs:
- Navigate to your Workspace
- Under Releases, navigate to Level 4 Outputs
- Choose the correct backend
- Pick the file you would like to view from the list of files (you can search)
Viewing released outputs🔗
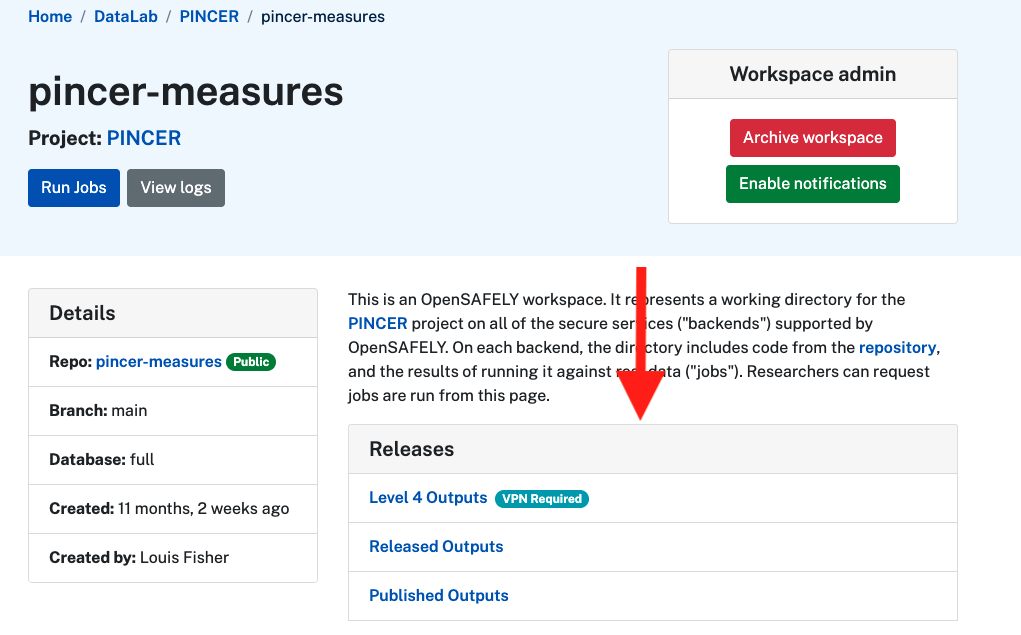
You can view the various output types from the Releases section (see red arrow below) of your workspace.
Any files that you would like to be released from the server, have to first be checked by our team of output checkers. Refer to the instructions for requesting a release.
Once reviewed, approved and released, your requested files will be available to view from your Workspace in the Released Outputs section of Releases. To view released outputs, you need to have the ProjectDeveloper or ProjectCollaborator role. If you would like to add a project collaborator to your Workspace, please read this section of the researcher policy and/or contact your co-pilot (if you have one).
Publishing outputs🔗
You must seek NHS England approval for any publication or wider sharing of results, papers, presentations (e.g. submitting to a journal or a pre-print server, or uploading to any public facing website). For instructions on how to request approval, please see this section of the researcher policy document.
Following approval from NHSE, you should also publish your released results on https://jobs.opensafely.org/. To do this, navigate to 'All outputs' which contains your latest outputs from within the "Released outputs" section of your workspace and click the Create a draft publication button. This will create a draft public output for review by the OpenSAFELY team; contact your co-pilot to prompt review. It is currently only possible to publish the latest version of all of these files. If you do not want to publish all of the latest outputs, please discuss this with your co-pilot.
Once approved, your released outputs will be “published” and viewable from the published outputs in the Published outputs section of your Releases. This is accessible by everyone, even those without a login.
As part of publishing your outputs, you should also make the repository where your analysis code is written public. Refer to the instructions on doing so.
Updating project status🔗
When you start a new project on OpenSAFELY it will have the Ongoing status, but as your work progresses you'll want to update this status.
If you are a member of a project you will see an Edit button near the top of your project page:
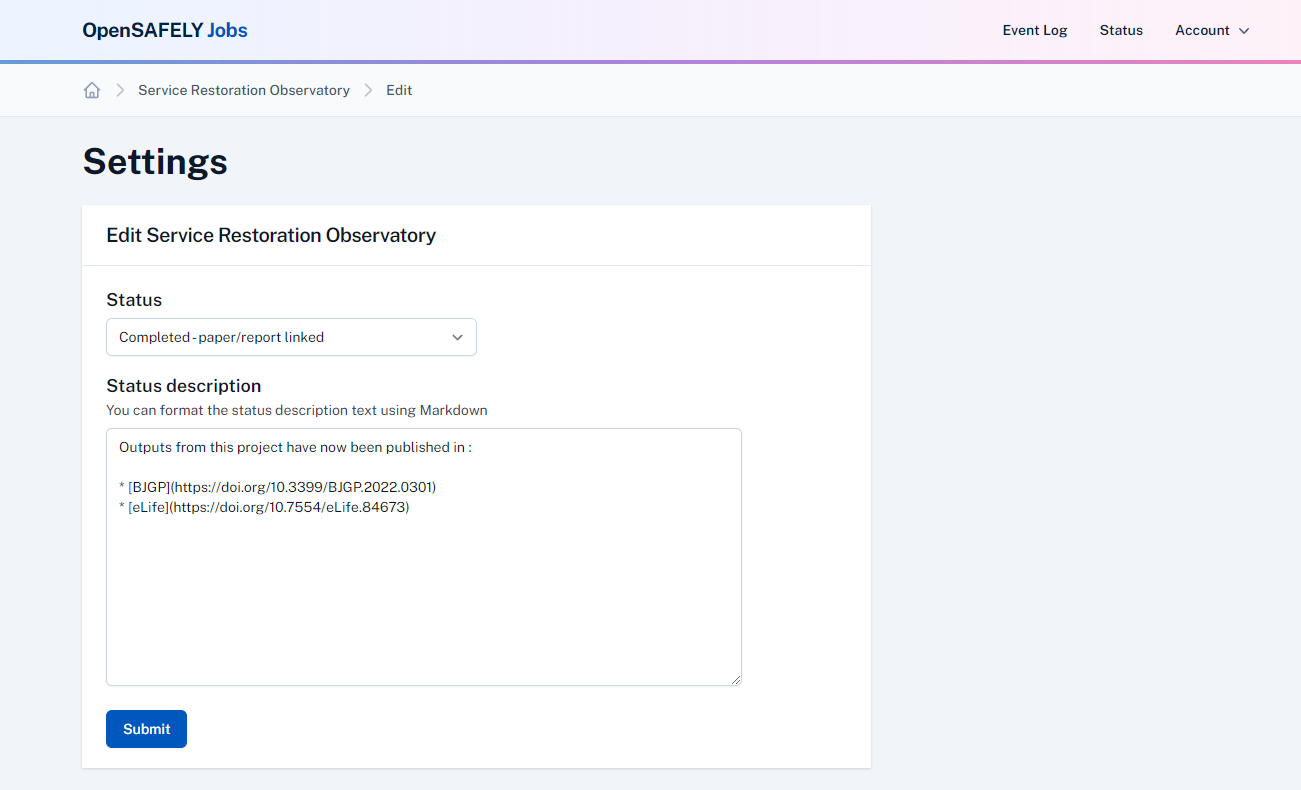
Select your project status using the options in the dropdown box. Further details should be provided in the Status description field. This field supports Markdown, so you can use this to provide links to any papers or reports that have been published (e.g. [Preprint](https://www.medrxiv.org/content/10.1101/2022.10.17.22281058v2)). See this guide for more information on how to use Markdown.
Guidance for each status type is provided below:
Postponed: provide the reasons why the project has been postponed. You must also contact our IG team to let them know.Retired: provide the reasons why the project has been retired and provide a brief report summarising any results. You must also contact our IG team to let them know.Ongoing - paper/report linked: provide URLs to published papers or reports (this includes preprints). If further papers/reports are expected, please give details.Completed - paper/reports linked: provide URLs to published papers or reports (this includes preprints). If further papers/reports are expected, please give details.Completed - awaiting paper/reports: provide some indication of when papers and/or reports are expected to be published.
Adding a workspace purpose🔗
You can add a purpose to each workspace within your project by navigating to the Edit workspace button within a workspace page. This should indicate the aim of any of the jobs run from within this workspace. You may only have one workspace, in which case the purpose can simply be "This is the main workspace or this project, in which all jobs were run". It can also be used to highlight workspaces used to carry out data quality checks or experiment with an analytical technique.
You will need to complete a workspace purpose for each workspace as part of project completion.